Showing posts with label Poster. Show all posts
on Friday, 28 June 2013

Make you own poster in Photoshop with your photos. I will use some photos of Bollywood actress Kareena Kapoor for this tutorial.


Step 1 : These are to two photos I intend to use. I will work on the top photo first.
Step 2 : Press ALT+CTRL+C on your keyboard. This will open up the Canvas Size dialogue box.I have put the width at 1 and height at 1.5 inches (highligted in blue). Make sure 'Relative' (highlighted in yellow) is ticked. Click ok. Note that the Width and Height can vary according tp the photo you use choose. We will look at what happens in a moment, but first have a look at the Layers/Channels/Paths pallette at right bottom of photoshop.

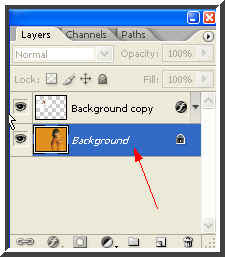
Step 3 : You will find the 'Background' (where the red arrow points to). Press CTRL+J on your keyboard and a duplicate layer called 'Layer 1' will form (see the small white hand).

Step 4 : Since I am using a photo with a white background the white border all round the is not quite visible. I will make it visible in a moment. In case you are using a picture with a colored background the white border will be immediately visible.

Step 5 : Go to Layer>Layer Style>Bevel and Emboss.

Step 6 : The Bevel and Emboss dialogue box opens. From the dropdown window change the 'Technique' (Highlighted in yellow) to 'Chisel Hard'. Drag the 'Depth' and 'Size' slider slightly towards the right in turn. You will note immediate change in your image as you drag each slider in turn. Then click ok.

Step 7 : The photo now has a bevelled edge.

Step 8 : Go to Layer>Flatten Layer.

Step 9 : Click the Move Tool (white arrow) to select it.

Step 10 : With the Move Tool selected drag the photo we have been working on to the other one while keeping the SHIFT key pressed. This will make the photo land exactly in the middle of the one behind it.

Step 11 : The photo has landed exactly in the middle like I said. Should your photo be a big one and covers the background. Click on it, press ALT on your keyboard and you will be able to resize it by dragging the corner handles. If you cannot see the corner handles make sure that 'Show Transform Controls' is checked in Photoshop CS 2. In Photoshop 7 you will find 'Bounding Box' in the same place. (See below).


Step 12 : Now use the Move Tool to move the photo to where you want it.

Step 13 : Go to Edit>Transform>Rotate as shown above.

Step 14 : Now hover the cursor near any one of the corners of the photo. You will imediately see a bent arrow appear (see above).

Step 15 : I have furthered repositioned it. Reposition as you like.

Step 16 : Now click the Move Tool or any other tool and this dialogue box will appear. Click Apply.

Step 17 : Go to Layer>Layer Style>Drop Shadow.

Step 18 : The Drop Shadow dialogue box opens. Drag the 'Distance', 'Spread' and 'Size' (highlighted in yellow) sliders in that order very slowly and slightly. Do not overdo it. As you drag each slider in turn you will notice how the drop shadow looks. Lastly drag the Opacity slider (highlighted in Green) to reduce it to 50 %. When you are satisfied click ok.

Step 19 : This is how the image now looks with the Drop Shadow.

Step 20 : In the Layers/Channels/Paths pallete click on the Background to select it. A selected layer is always highlighted.

Step 21 : Now click on the Type Tool. It is the 'T' icon shown by the red arrow. Clicking it will reveal the Horizontal Tool. Click to select it.

Step 22 : On the top panel where the white arrow points to you will find a drop down box giving all the fonts (blue arrow) available. The red arrow points to the size of the fonts.

Step 23 : With the Type Tool selected draw out a rectangular selection as above where you wish to add text. You can see the cursor in the middle. Should you not be able to see the cursor, it will mean that the size of the font you have chosen is larger than the box. In that case lower the size of the font (the red arrow in Step 23). Just enter a value in the box to set the size of the font.

Step 24 : I have typed in the text. You can type in whatever you like.

Step 25 : In the Layers/Channels/Paths pallete notice that the type layer is highlighted which means it is selected. Now drag the 'Fill' (highlighted in yellow) all the way down to zero. You will find that the text that you just typed in disappear.

Step 26 : Now go to Layer/Layer Style>Inner Shadow.

Step 27 : When the Inner Shadow dialogue box opens. Just click ok.

Step 28 : This how the poster now looks.

Step 29 : Now click back on the Background layer to select it.

Step 30 : Go to the top right hand of photoshop and click Brushes.

Step 31 : When you click Brushes, this dialogue box opens. Choose 'Assorted Brushes'.
Step 32 : As soon as you click on Assorted Brushes this dialogue box opens. Click ok. (After you have completed the tutorial access Brushes and click 'Reset Brushes'. This will set it back to default.)

Step 33 : Make sure Foreground is set to White. You can switch between the Foreground and Background color by clicking the small bent arrow.

Step 34 : Now at the left hand top of photoshop access the Brush dialogue box. From the drop down box choose the brush I have chosen.

Step 35 : Now click the Brush Tool shown by the red arrow and select Brush Tool from the flyout.


Step 36 : Click all around the edges with brush. Use the Bracket Keys [ ] to make the brush tip bigger or smaller. It is a shortcut. And that is all. Go to Layer>Flatten Layer. Go to File>Save As. Save as Jpeg.

I have used some additional brushes, but they are not available in photoshop. You can download them here.

Here is another poster that you can try out. It will familarise you with some of the tools available in Photoshop. The permutation and combination of the tools are endless. This is just an attempt to demonstrate what can be achieved. You have only to leave it to your imagination. And, you can come up with something even better than what I have done.

Step 1 : I have opened a new white layer. Choose your size. It does not matter, but the larger the better.

Step 2 : First click the Foreground color (A). It is black by default. Click it and the Color Picker (B) opens. Now I have clicked a green shade from the column in the middle (C). I have picked the shade I want (D). Click ok.

Step 3 : Note that the Foreground color is now the shade of green I have picked. Now click the Gradient Tool (blue arrow).

Step 4 : With the Gradient drag up from bottom to top keeping the SHIFT key pressed. Keeping the SHIFT key pressed ensures that you can drag up vertically and straight.

Step 5 : The gradient has been applied.

Step 6 : Go to Filter>Distort>Wave.
Step 7 : When the Wave dialogue box opens check 'Square' then click 'Randomise' once or twice.

Step 8 : This is effect I have got.
Step 9 : Go to Filter>Distort>Polar Coordinates.
Step 10 : When the Polar Coordinates dialogue box opens make sure that 'Rectangular to Polar is checked.

Step 11 : This is the effect you get.

Step 12 : Double click the 'Background' and the New Layer dialogue opens. Click ok.

Step 13 : Click the Magic Wand Tool to select it and apply it to the white rays in the middle. You will find that it selects an area on its own.

Step 14 : Go to Select. You will find 'Grow' and 'Similar'. Click 'Grow' and 'Similar' in turn till all the white is selected as shown below.

Step 15 : The white rays have been selected. Press CTRL+J on your keyboard to copy and paste the selection onto a new layer.

Step 16 : The selection has been copied onto Layer 1.

Step 17 : Now click the 'f' like icon. It opens the Layer Style dialogue.

Step 18 : From the popup click on 'Bevel and Emboss'.

Step 19 : This is the effect you get.

Step 20 : Go to Filter>Distort>Spherize

Step 21 : This dialogue box open. Click ok.

Step 22 : This is the effect you get.

Step 23 : Again click the Layer Style button. This time choose Outer Glow.

Step 24 : In the Outer Glow Structure above drag the 'Spread' and 'Size' sliders to the right till you are satisfied with the result. As you drag the sliders you will be able to see the effect. Click ok.

Step 25 : This is the effect you get.

Step 26 : Click Brushes at the top right of Photoshop. You will find a small black arrow appear. Click it and a drop down window will appear with all the brushes available. Click any to select. I will be using some free brushes that I have downloaded (click here for going to download links) for the tutorial.

Step 27 : When you click a brush (which is a set of brushes) this dialogue appears. Click ok.

Step 28 : Now click the Brush Tool from the flyout on the left panel.

Step 29 : Click where the red arrow points to and a drop down will appear where you can see the brushes you have chosen. The Master diameter is the size of the bursh tip. You can also the bracket keys [ ] on the keyboard to increase or decrease the size or tip of the brush or you can use the slider below the Master Diameter. The Hardness determines how strong your impression with the brush will be. The slider below it controls the hardness. Experiment with it to see how it works.

Step 30 : I have chosen a particular brush marked with the red arrow.

Step 31 : You can see the actual brush as also where I have clicked it.

Step 32 : I have used another brush here. These brushes are available for download from the links that I have provided.

Step 33 : Click on the Elliptical Marquee Tool.

Step 34 : I have opened this photo of Kareena Kapoor and used the Elliptical Marquee Tool to make a selection around her face.

Step 35 : Go to Edit>Copy.

Step 36 : Now I have clicked on the image I was working on and gone to Edit>Paste.

Step 37 : Kareena Kapoor's round image has been pasted.

Step 38 : I have clicked on the Move Tool to select it and have moved Kareena's image a little to the right. Make sure that 'Show Transform Controls' (or ' Bounding Box' in PS7) in the top panel (highlighted in yellow) is checked. This will enable you to see the corner handles.

Step 39 : I have opened another image of Kareena which I will Copy and Paste as in the earlier step to the image I was working on.

Step 40 : I have copied and pasted the second photo of Kareena to the image I was working on and have used the Move Tool to shift it a little to the left.

Step 41 : Look at the Layers/Channels/Paths pallette. The second photo of Kareena is in Layer3 i.e. the topmost layer because it was the last layer to be added. Just below ir Layer 2 contains the first photo of Kareena that I pasted. Layer 1 is the cutout effect that I gave. Layer 0 is the bottom most layer that I started with. Note that Layer 3 is highlighted i.e. because it is selected. The selected layer is always highlighted.

Step 42 : Click the Layer Style icon like 'f' where the red arrow points to. When the popup appears click Stroke.

Step 43 : When the Stroke dialogue box opens. Click 'Color' marked with the red arrow. This will open the Color Picker.

Step 44 : In the Color Picker click where 'A' points to. This will change the red into white in 'Color' and at the now half white half red box. Click ok.

Step 45 : In the Layer Style dialogue box drag the 'Size' slider till you are satisfied with the effect. You will be able to see the effect as you drag the slider. Click ok.

Step 46 : The Stroke has been added.

Step 47 : Now click on Layer 2 which has the other photo of Kareena.

Step 48 : Click on the Layer Style button 'f' and again select Stroke from the popup.

Step 49 : Click on Color, which by default is red. This opens the Color Picker. Now click the white at the left, this will change the color to white. Click ok in the Color Picker.

Step 50 : In the Layer Style dialogue box, again drag the Size slider to the right suitably. Click ok.

Step 51 : Now both the images of Kareena have strokes or white borders around them. Now for some text.

Step 52 : This is the Text Tool. Click to select it.

Step 53 : When you click the Text Tool look at the top panel, A is where the fonts are. Click for a drop down box of all fonts available. B is to set the color of the text. C is the alignment of the text and D is the size of the font. You can set the size by entering a value in the box.

Step 54 : Click B in Step 53 and this will bring up the Color Picker. I have chosen a green color in the middle column (A). Then I have clicked on the shade of green (B). As soon as the color is selected the color in the top half of the box (C) changes to green. Click ok.

Step 55 : With the Text Tool selected draw an outline as above where the text will go.

Step 56 : The text should go on the top layer. For that click on Layer 3 to make it active, then click the Text Tool. The text will automatically become the top layer.
Step 57 : The text has been added. Use the keyboard to type in the text.

Step 58 : Go to Filter>Distort>Polar Coordinates.
Step 59 : This dialogue box opens asking to Rasterize the type. Click ok.
Step 60 : Now the Polar Coordinates dialogue box opens. Make sure that Rectangular to Polar is checked and click ok.

Step 61 : Click the Add Layer Style button in the Layers/Channels/Paths pallette. Click Bevel and Emboss from the popup.

Step 62 : When the Bevel and Emboss dialogue opens just check the 'Contour' and click ok.

Step 63 : Click the Layer Style button again. Now click Outer Glow from the popup.
Step 64 : In the Outer Glow dialogue box increase the Spread and Size. You can see the effect as you drag the sliders. Click ok.

And here is the completed poster. I have shown some of the tools available to create one. You can use your own imagination to create your own posters. That's all for now.