
Step 1 : The Buddha image (see below this post) has powerlines passing behind it. This detracts from the image. My friend Sunil Mukhopadhyay asked me to remove them.
It is possible to remove them with the Clone Stamp Tool.
Click it from the flyout to activate it.

Step 2 : CLick the Zoom Tool. You can use [ ] keys on the keyboard to increase and decrease the zoom after clicking the Zoom Tool.

Step 3 : Now Press ALT while clicking to select an area to clone. I have chosen an area above the power cables.

Step 4 : Now that with each ALT + click the power lines disappear. This is possible with Photoshop7. Photoshop CS 2 users can employ another method which is easier.
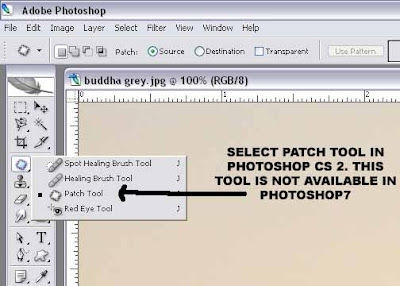
Step 4 : (For Photoshop CS 2) Click the Patch Tool to activate it.

Step 5 : (Photoshop CS 2) Draw an outline of the area for selecting it as shown with the Patch Tool.

Step 6 : Now place the Patch Tool in the middle of the selection and drag either up/down/right or left depending on your image. Here I have dragged upwards.

Step 7 : (Photoshop CS 2) The power cable for the portion has vanished. You will have to work carefully and painstakingly with this tool. But it pays off in the end.

And this is the completed image. The power cables in the background have completely vanished.
Try it out i.e. the Clone Stamp and Patch Tool. You may at times have to use a combination of both.
0 comments:
Post a Comment