I had earlier posted a tutorial to make a vignette (see here) with a photo. This is another method of making a vignette.


Step 1 : I have opened this image of Angelina Jolie in Photoshop.
Step 2 : Click on the New Layer Button (see arrow). A new layer is formed.
Step 3 : Now click the Foreground and Background color. (See arrow).
Step 4 : This brings up the Select Foreground color dialogue box. Use the eyedropper tool (not shown) in the dialogue box. I have clicked on the spot circled in white. The color selected is dark brown.
Step 5 : Now click the gradient Tool from the flyout.
Step 6 : With the Gradient Tool selected drag from bottom to top.

Step 7 : The image is now completely covered with the gradient.

Step 8 : Now select the Rectangular Marquee Tool.

Step 9 : With the Rectangular Marquee Tool selected drag down from the top left hand corner to the right bottom corner and you will get a selection as above.

Step 10 : Now go to Select>Feather as shown.

Step 11 : This dialogue box opens. I have set the Feather Radius to 30 pixels. For images with a higher resolution you can set it to a higher number of pixels.
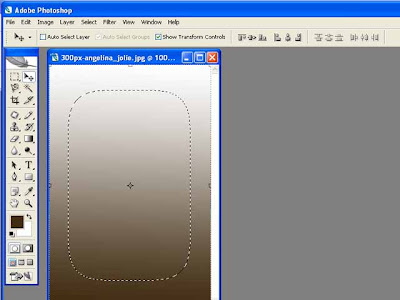
Step 12 : With the feather the rectangular selection has rounded edges now.

Step 13 : Now hit the back space key on your keyboard and the vignette is complete.
You can continue with the following steps if you wish.
Step 14 : Go to Select>Inverse. There will now be two 'marching ants' columns. The original one and the one at the edge. (See above).

Step 15 : Again select the Gradient Tool. Now drag from the top to the bottom. After this press CTRL+D on the keyboard to deselect.

Step 16 : The completed image.
0 comments:
Post a Comment